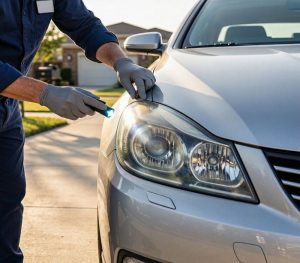
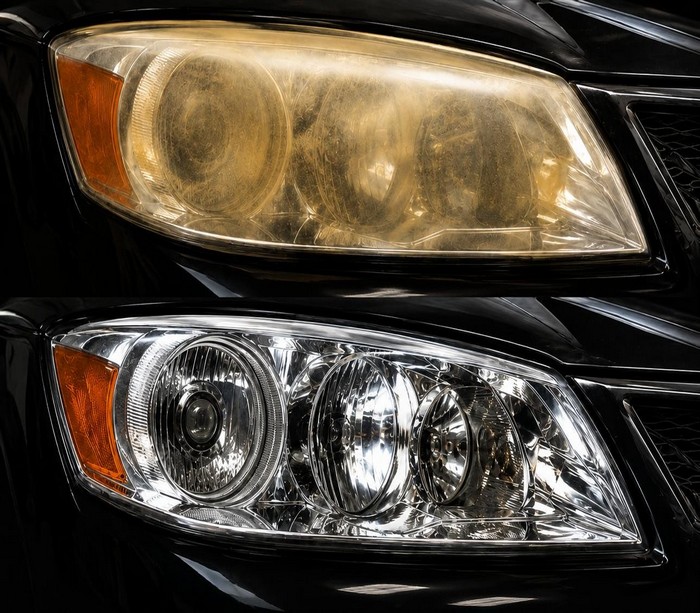
Mobile headlight restoration step-by-step tips help drivers understand how professionals remove oxidation, restore clarity, and protect headlight lenses from future damage.
With the right preparation, sanding techniques, polishing products, and UV-resistant coating, many hazy plastic headlights can regain a clearer appearance without replacing the entire assembly.
At Headlight Hero’s, we help Houston drivers understand the restoration process and enjoy the convenience of professional mobile service.
You do not need to drive to a shop or leave your vehicle for days to address cloudy headlights. A trained technician can perform the service at an approved home or workplace location.
This guide explains the headlight restoration step-by-step tips, from the initial inspection to long-term maintenance.
What Is Mobile Headlight Restoration?
Mobile headlight restoration removes surface oxidation, yellowing, and haze from compatible headlight lenses. Instead of replacing the entire headlight assembly, a technician restores the existing lens when its condition allows.
Professional headlight restoration step-by-step tips includes:
- Inspecting the lens for oxidation, scratches, cracks, and internal damage.
- Washing the headlight and removing surface contaminants.
- Masking surrounding paint and trim.
- Sanding the oxidized surface with suitable abrasives.
- Polishing the lens to improve optical clarity.
- Applying a compatible UV-resistant protective coating.
- Inspecting the finished headlights for clarity and consistency.
The exact process depends on the lens material, the extent of the damage, and the coating system the technician uses.
Step 1: Inspect Headlights for Oxidation and Damage
Begin by examining both headlights in natural daylight or under a bright inspection light. Look for yellowing, chalky residue, cloudy patches, fine surface scratches, and uneven discoloration.
Also, check for cracks, moisture inside the assembly, broken mounting points, and damage behind the lens. Exterior restoration cannot correct every headlight problem.
For a detailed inspection checklist, read how to inspect headlights for oxidation, yellowing, and damage.
Step 2: Clean and Prepare the Headlights
Wash the headlight lenses with automotive-safe soap and water. Remove road film, dust, grease, insect residue, and other contaminants before sanding.
Dry the surface thoroughly and inspect it again. Clean preparation helps prevent dirt from interfering with the sanding process or creating additional scratches.
Step 3: Mask and Protect Surrounding Paint
Apply automotive masking tape around the headlight perimeter. Cover nearby painted panels, rubber seals, chrome trim, and sensitive plastic components where appropriate.
Secure the tape carefully so sanding residue and polishing compounds do not reach the surrounding finish. Proper masking also reduces the risk of accidental contact from sanding pads and polishing tools.
Step 4: Sand the Oxidized Lens
Sanding removes degraded surface material and creates a uniform foundation for polishing. Professionals select abrasive grits based on the severity of the oxidation, the lens condition, and the restoration system.
A heavily oxidized lens may require a coarser starting grit, followed by progressively finer abrasives. A lens with mild oxidation may need a less aggressive approach.
Keep the surface and abrasive properly lubricated when the process calls for wet sanding. Use even pressure, consistent movements, and the recommended sanding sequence.
Step 5: Polish Headlights for Clarity
After sanding, polish the lens with a compatible headlight polishing compound and suitable pad. Polishing refines the sanding marks and improves surface clarity.
Use controlled machine speed and light, consistent pressure when working with a dual-action polisher. Avoid excessive heat, which can damage plastic lenses. Inspect the surface frequently and repeat the appropriate polishing step if visible sanding marks remain.
Step 6: Apply UV-Resistant Headlight Coating
Restored plastic lenses need suitable protection because ultraviolet radiation can cause renewed oxidation and yellowing. After polishing, prepare the surface according to the coating manufacturer’s instructions.
Apply a compatible UV-resistant coating evenly and allow it to cure for the specified period. Avoid touching the coating or exposing it to water, dust, or chemicals before it reaches the required cure stage.
Step 7: Inspect the Finished Headlights
Once the coating has cured as directed, inspect both lenses under consistent lighting. Look for remaining haze, uneven polishing marks, coating streaks, and untreated areas.
Compare the overall appearance of both headlights. If you notice internal condensation, cracks, or persistent optical problems, investigate those issues separately rather than assuming another polishing pass will solve them.
Step 8: Maintain Restored Headlights
Clean restored headlights with automotive-safe products and a soft microfiber cloth. Avoid abrasive pads, harsh solvents, and aggressive polishing unless the coating manufacturer approves them.
Park in shaded areas when practical, follow the coating’s maintenance instructions, and inspect the lenses periodically for renewed haze or coating deterioration.
For more guidance, see Headlight Restoration Is Better Than Replacing Your Headlights
.
Restoration Step-by-Step Tips: Why the Process Matters
Imagine getting ready for an evening drive and noticing that your headlights look yellow instead of clear. You wash the vehicle, but the haze remains because oxidation has affected the lens surface.
Rather than immediately purchasing replacement assemblies, you arrange a professional inspection. A technician evaluates the damage, restores the lens when appropriate, and applies a compatible protective coating to help preserve the result.
That is why each restoration stage matters. Skipping preparation, rushing the sanding process, or neglecting UV protection can undermine the final finish.
Can You Restore Cloudy Headlights Without Replacing Them?
Yes, many headlights with exterior oxidation and yellowing can be restored without replacing the assembly. However, restoration may not resolve cracked lenses, severe pitting, internal moisture, damaged reflectors, or internal component failures.
A professional inspection helps determine whether restoration offers a practical solution or whether repair or replacement makes more sense.
Why Choose Mobile Headlight Restoration in Houston?
Houston’s sun, heat, rain, and everyday driving conditions can contribute to the deterioration of exterior plastic headlight lenses. Mobile service lets you address cloudy headlights without arranging a trip to a traditional repair shop.
Headlight Hero’s brings professional headlight restoration directly to your home, office, or another approved location in Houston and surrounding communities. We focus on removing exterior oxidation, improving lens clarity, and applying appropriate protection to help maintain the result.
Frequently Asked Questions
How long does headlight restoration take?
Many professional restorations take approximately 60 minutes, although lens condition, preparation requirements, and coating cure instructions can affect the total appointment time.
What causes headlights to turn yellow?
Ultraviolet exposure, environmental contaminants, surface wear, and deterioration of the lens’s original protective layer can cause plastic headlights to become yellow, cloudy, or hazy.
Does polishing alone permanently restore headlights?
No. Polishing may improve clarity, but it does not automatically provide durable UV protection. A compatible protective coating is an important part of many professional restoration systems.
How long does restored headlight clarity last?
Results vary with the restoration process, coating quality, exposure, maintenance, and driving conditions. Follow the coating manufacturer’s care instructions rather than relying on a universal lifespan.
Schedule Your Mobile Headlight Restoration
We bring our professional headlight restoration service directly to your home, office, or other convenient location. Experience the convenience of professional mobile service and enjoy clearer, brighter headlights without leaving your driveway.
For more information about our services, visit us on Pinterest, TikTok, Instagram, Facebook, or YouTube.
Contact Headlight Hero’s today to schedule your mobile headlight restoration and experience the convenience of professional service brought directly to you.
Visit Online Booking to book your headlight restoration today and see the Houston sun reflect off headlights that actually look new again!